
学习笔记:尚硅谷Spring6基础篇_尚硅谷spring6资料-CSDN博客
尚硅谷Spring零基础入门到进阶,一套搞定spring6全套视频教程(源码级讲解)_哔哩哔哩_bilibili
Spring Framework Documentation :: Spring Framework
概述
Spring 是一款主流的 Java EE 轻量级开源框架 ,由于其轻便、易用和高效,被广泛应用于企业级Java应用开发中。
Spring包含了很多子框架和扩展,如Spring MVC、Spring Boot、Spring Cloud等。
Spring的主要特点是IOC容器和AOP技术,它们使得Java应用的开发和管理更加简单和高效。
Spring 目的是用于简化 Java 企业级应用的开发难度和开发周期。Spring 框架除了自己提供功能外,还提供整合其他技术和框架的能力
狭义和广义
- 广义的 Spring:Spring 技术栈
广义上的 Spring 泛指以 Spring Framework 为核心的 Spring 技术栈。
经过十多年的发展,Spring 已经不再是一个单纯的应用框架,而是逐渐发展成为一个由多个不同子项目(模块)组成的成熟技术,例如 Spring Framework、Spring MVC、SpringBoot、Spring Cloud、Spring Data、Spring Security 等,其中 Spring Framework 是其他子项目的基础。
这些子项目涵盖了从企业级应用开发到云计算等各方面的内容,能够帮助开发人员解决软件发展过程中不断产生的各种实际问题,给开发人员带来了更好的开发体验。
- 狭义的 Spring:Spring Framework
狭义的 Spring 特指 Spring Framework,通常我们将它称为 Spring 框架。
Spring 框架是一个分层的、面向切面的 Java 应用程序的一站式轻量级解决方案,它是 Spring 技术栈的核心和基础,是为了解决企业级应用开发的复杂性而创建的。
Spring 有两个最核心模块: IoC 和 AOP。
- IoC:Inverse of Control 的简写,译为“控制反转”,指把创建对象过程交给 Spring 进行管理。
- AOP:Aspect Oriented Programming 的简写,译为“面向切面编程”。AOP 用来封装多个类的公共行为,将那些与业务无关,却为业务模块所共同调用的逻辑封装起来,减少系统的重复代码,降低模块间的耦合度。另外,AOP 还解决一些系统层面上的问题,比如日志、事务、权限等。
模块组成
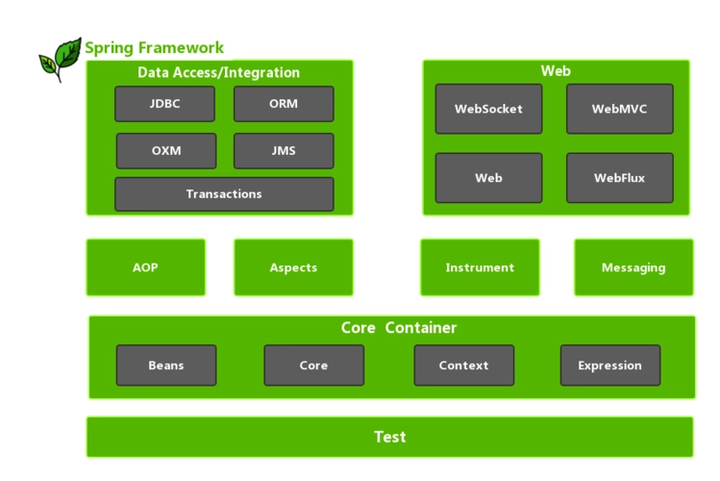
Spring Core(核心容器)
spring core提供了IOC,DI,Bean配置装载创建的核心实现。核心概念: Beans、BeanFactory、BeanDefinitions、ApplicationContext。
- spring-core :IOC和DI的基本实现
- spring-beans:BeanFactory和Bean的装配管理(BeanFactory)
- spring-context:Spring context上下文,即IOC容器(AppliactionContext)
- spring-expression:spring表达式语言
Spring AOP(面向切面编程)
- spring-aop:面向切面编程的应用模块,整合ASM,CGLib,JDK Proxy
- spring-aspects:集成AspectJ,AOP应用框架
- spring-instrument:动态Class Loading模块
Spring Data Access(数据访问)
- spring-jdbc:spring对JDBC的封装,用于简化jdbc操作
- spring-orm:java对象与数据库数据的映射框架
- spring-oxm:对象与xml文件的映射框架
- spring-jms: Spring对Java Message Service(java消息服务)的封装,用于服务之间相互通信
- spring-tx:spring jdbc事务管理
Spring Web(应用程序)
- spring-web:最基础的web支持,建立于spring-context之上,通过servlet或listener来初始化IOC容器
- spring-webmvc:实现web mvc
- spring-websocket:与前端的全双工通信协议
- spring-webflux:Spring 5.0提供的,用于取代传统java servlet,非阻塞式Reactive Web框架,异步,非阻塞,事件驱动的服务
Spring Message(消息传递)
- Spring-messaging:spring 4.0提供的,为Spring集成一些基础的报文传送服务
Spring test(测试)
- spring-test:集成测试支持,主要是对junit的封装
Spring6特性
Spring6要求最低的JDK版本是Java17
GETTING STARTED
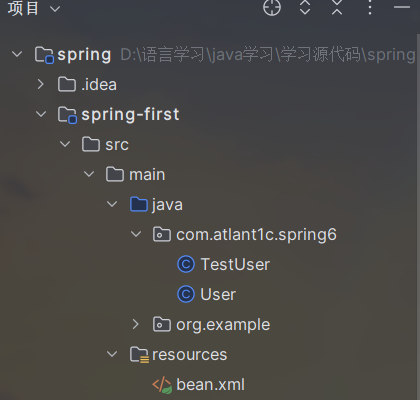
创建maven聚合工程
父工程spring6
子模块spring-first
步骤
- 引入spring相关依赖
- 创建类,定义属性和方法
- 按照spring要求创建配置文件(xml格式)
- 在spring配置文件配置相关信息
- final test
添加依赖
spring框架
1 | <dependency> |
以及junit
1 | <!-- https://mvnrepository.com/artifact/org.junit.jupiter/junit-jupiter-api --> |
用于后面那个@Test注释来进行运行代码
创建类,定义属性和方法
新建包com.atlant1c.spring6
新建两个类
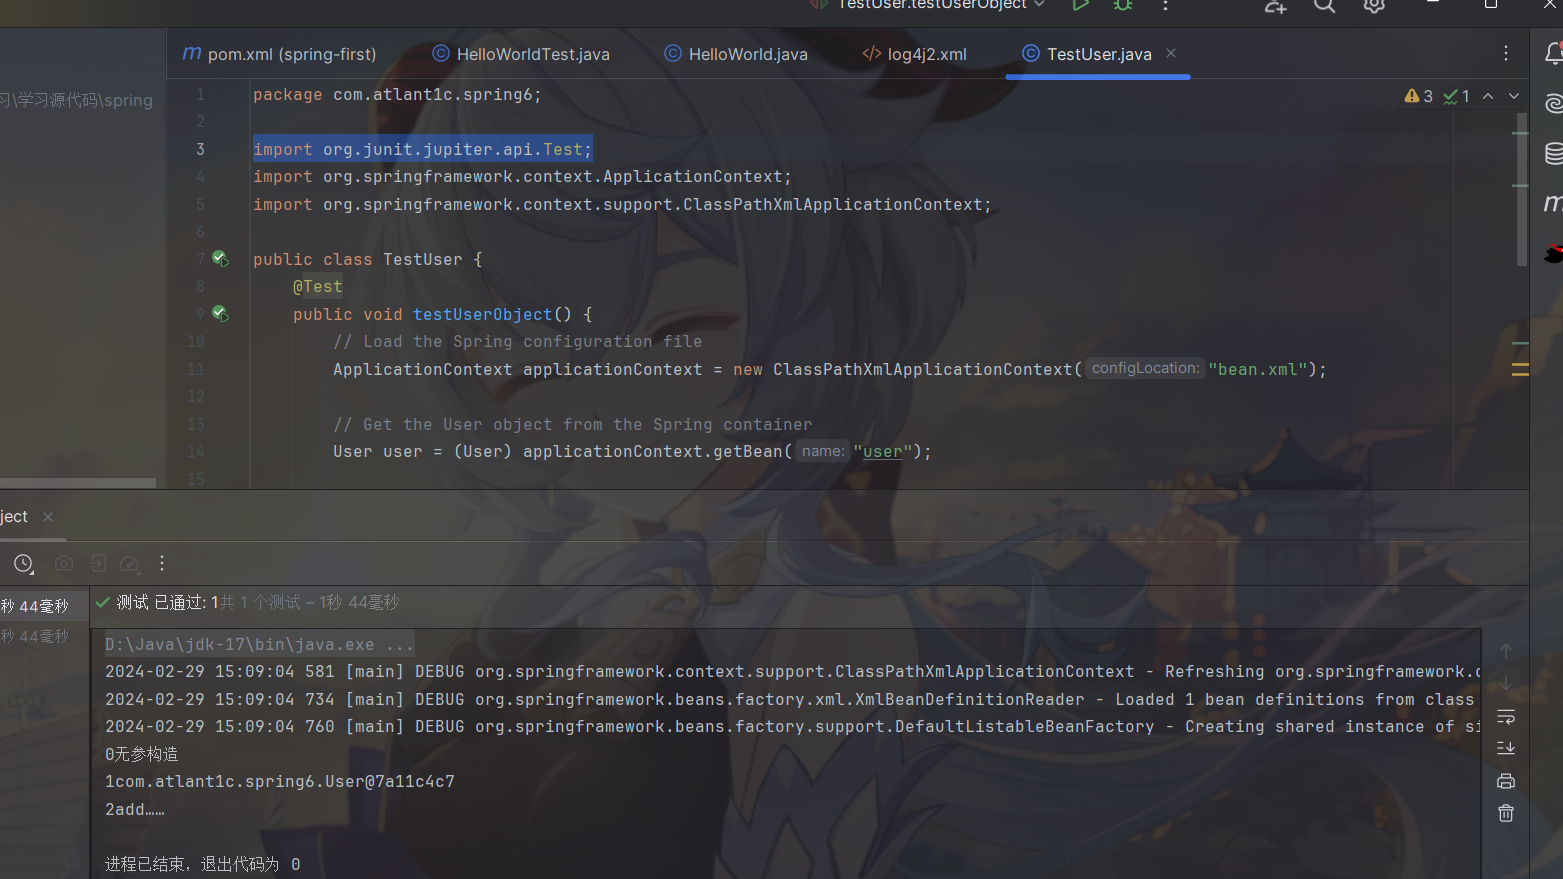
User.java
1 | package com.atlant1c.spring6; |
TestUser.java
1 | package com.atlant1c.spring6; |
在rseources目录下新建配置文件bean.xml
1 |
|
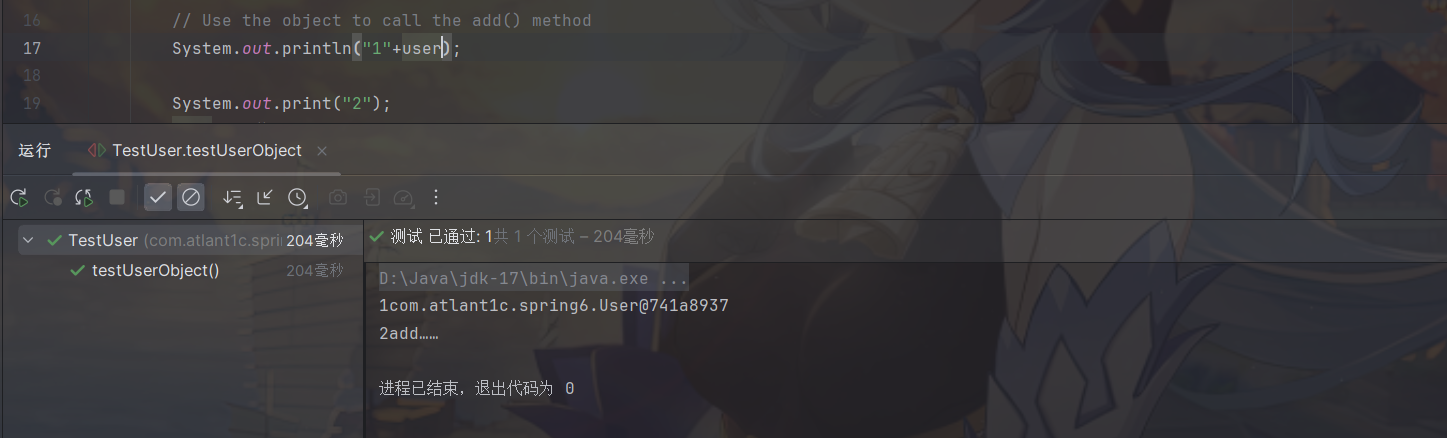
运行
第一行输出的是user方法的地址值
第二行是调用user方法输出字符串
踩坑记录
【idea中URI is not registered错误】_uri未注册-CSDN博客
xml注释要用形如<!---->
思考
之前创建对象,无参数构造执行?
在User.java添加无参构造
1 | public User(){ |
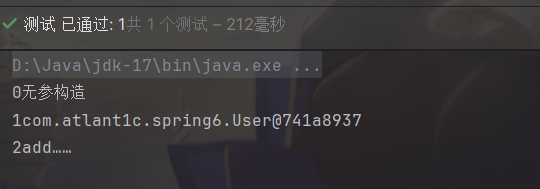
可以看到执行了。
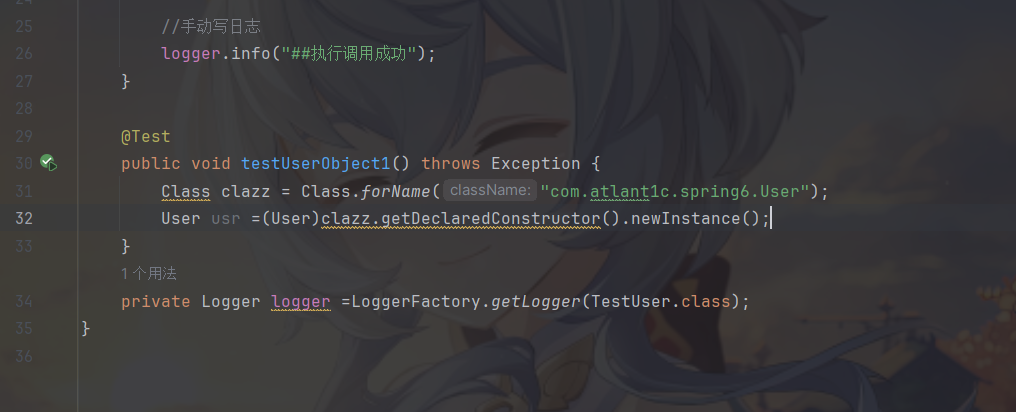
不用new怎么样创建对象?
利用反射
如何使用反射创建的对象
加载bean.xml配置文件
对xml文件进行解析
获取xml文件bean标签属性值(id和class)
使用反射根据类全路径创建对象
1
2Class clazz = Class.forName("com.atlant1c.spring6.User");
User usr =(User)clazz.getDeclaredConstructor().newInstance();
创建对象放到哪里?
添加Log4j2框架
概述:Log4j2是一个开源的Java日志框架,帮助Java开发人员在应用程序中实现灵活和可配置的日志记录
组成:日志信息的优先级,日志信息的优先级从高到低有TRACE < DEBUG < INFO < WARN < ERROR < FATAL
说明:
- TRACE:追踪,是最低的日志级别,相当于追踪程序的执行
- DEBUG:调试,一般在开发中,都将其设置为最低的日志级别
- INFO:信息,输出重要的信息,使用较多
- WARN:警告,输出警告的信息
- ERROR:错误,输出错误信息
- FATAL:严重错误
- 日志信息的输出目的地,日志信息的输出目的地指定了日志将打印到控制台还是文件中;
- 日志信息的输出格式,而输出格式则控制了日志信息的显示内容。
引入框架依赖
1 | <dependency> |
加入配置文件
同样在resourse添加log4j2.xml配置文件
1 |
|
使用日志
自定义日志
容器Ioc
概述
容器放bean对象,存在map里面。
定义
IoC (Inversion of Control),即控制反转,是一种设计模式或者说设计思想,它是面向对象编程中的一种概念,用来描述对象之间的依赖关系,指导我们如何设计出松耦合、更优良的程序。
简介
Spring 通过 IoC 容器来管理所有 Java 对象的实例化和初始化,控制对象与对象之间的依赖关系。我们将由 IoC 容器管理的 Java 对象称为 Spring Bean,它与使用关键字 new 创建的 Java 对象没有任何区别。
作用
在 IoC 模式中,控制权从程序代码中转移到了容器中,即通过容器来管理对象的创建、销毁、依赖注入等操作,而应用程序本身只需要使用这些对象即可。这样,应用程序就不需要自己管理对象之间的依赖关系,而是由容器来管理,从而实现了代码的解耦和更好的可维护性,提高程序扩展力。
说明:
- 将对象的创建权利交出去,交给第三方容器负责
- 将对象和对象之间关系的维护权交出去,交给第三方容器负责
实现过程
xml配置文件:
Bean定义信息BeanDefinition。
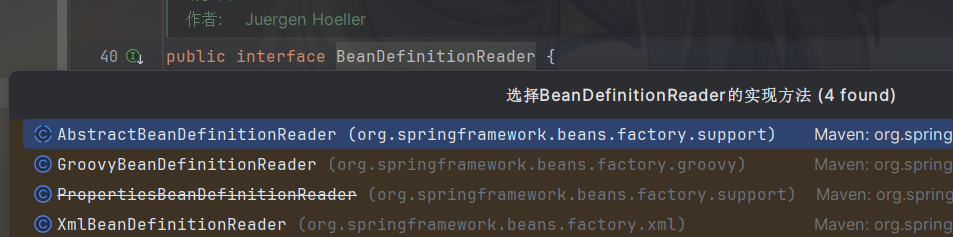
抽象(接口):
BeanDefinitionReader
Ioc容器:
- Bean定义信息
- 实例化(BeanFactory工厂+反射)
- 初始化
- 最终对象
context.getBean("");
依赖注入
控制反转思想的实践。
定义
依赖注入(Dependency Injection,DI)是一种设计模式,其主要思想是在程序运行的过程中,通过外部容器(如Spring容器)动态地将依赖对象注入到程序中,以解耦对象之间的依赖关系,从而提高程序的灵活性、可维护性和可测试性。
作用
Spring通过依赖注入的方式来完成Bean管理的。换句话说,依赖注入,依赖注入实现了控制反转的思想。依赖指的是对象和对象之间的关联关系。注入指的是一种数据传递行为,通过注入行为来让对象和对象产生关系。
补充:
Bean管理说的是:Bean对象的创建,以及Bean对象中属性的赋值(或者叫做Bean对象之间关系的维护)。
实现方式
- 第一种:set注入
- 第二种:构造注入
实现
Spring 的框架中,IoC 容器是通过 BeanFactory 和 ApplicationContext 接口实现的。BeanFactory 接口是 Spring 框架最底层的接口,提供了基本的 IoC 功能;ApplicationContext 接口是 BeanFactory 接口的子接口,提供了更高级的特性和功能,如 AOP、国际化、事件驱动等。其中BeanFactory 接口,最重要的方法是getBean()方法,用于从容器中获取对象。
Spring 的 IoC 容器就是 IoC思想的一个落地的产品实现。IoC容器中管理的组件也叫做 bean。在创建 bean 之前,首先需要创建IoC 容器。Spring 提供了IoC 容器的两种实现方式:
- BeanFactory:这是 IoC 容器的基本实现,是 Spring 内部使用的接口。面向 Spring 本身,不提供给开发人员使用。
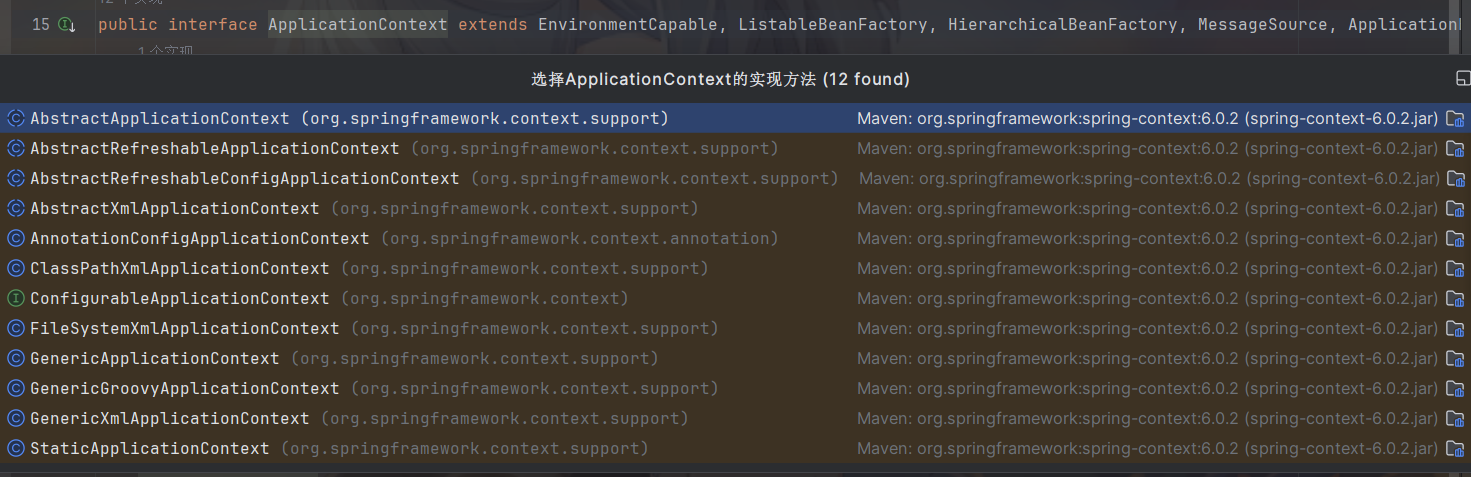
- ApplicationContext:BeanFactory 的子接口,提供了更多高级特性。面向 Spring 的使用者,几乎所有场合都使用 ApplicationContext 而不是底层的 BeanFactory
ApplicationContext的主要实现类:
| 类型名 | 简介 |
|---|---|
| ClassPathXmlApplicationContext | 通过读取类路径下的 XML 格式的配置文件创建 IOC 容器对象 |
| FileSystemXmlApplicationContext | 通过文件系统路径读取 XML 格式的配置文件创建 IOC 容器对象 |
| ConfigurableApplicationContext | ApplicationContext 的子接口,包含一些扩展方法 refresh() 和 close() ,让 ApplicationContext 具有启动、关闭和刷新上下文的能力。 |
| WebApplicationContext | 专门为 Web 应用准备,基于 Web 环境创建 IOC 容器对象,并将对象引入存入 ServletContext 域中。 |
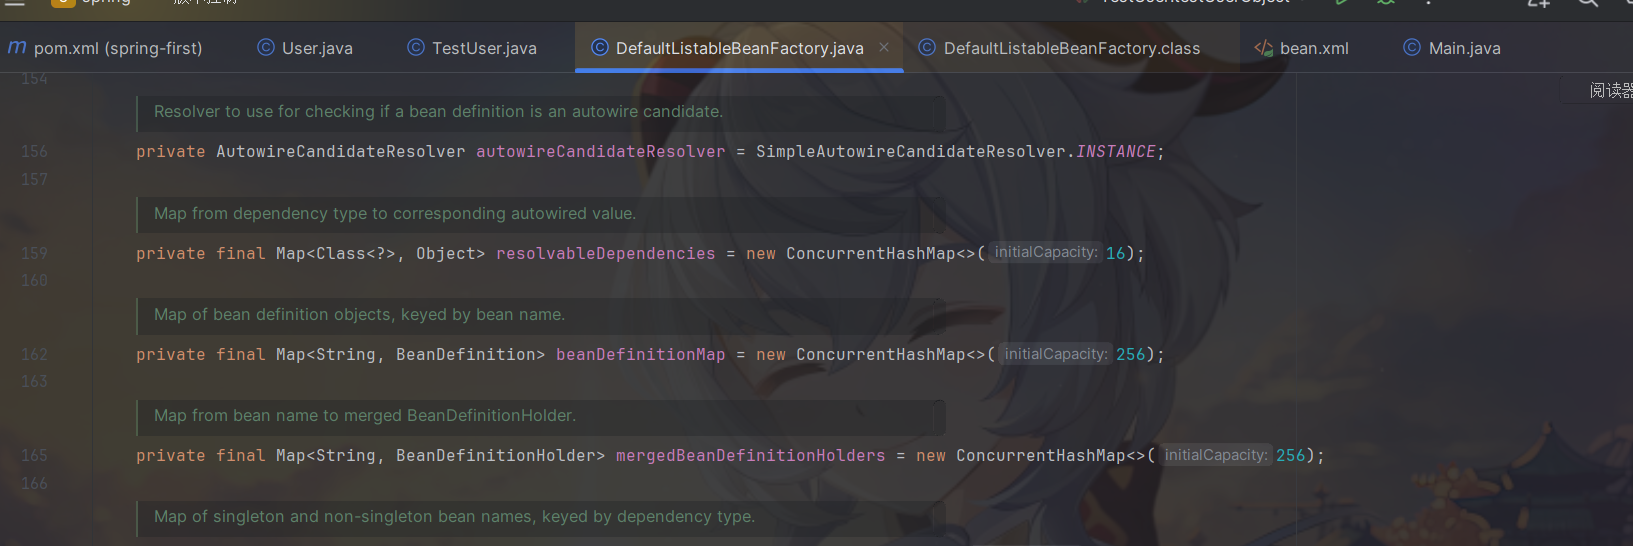
基于xml管理bean
获取bean
1 | package com.atlant1c.spring6.iocxml; |

基于set方法完成
创建类,定义属性,生成属性set方法
1 | package com.atlant1c.spring6.iocxml.di; |
在spring配置文件中配置
1 |
|
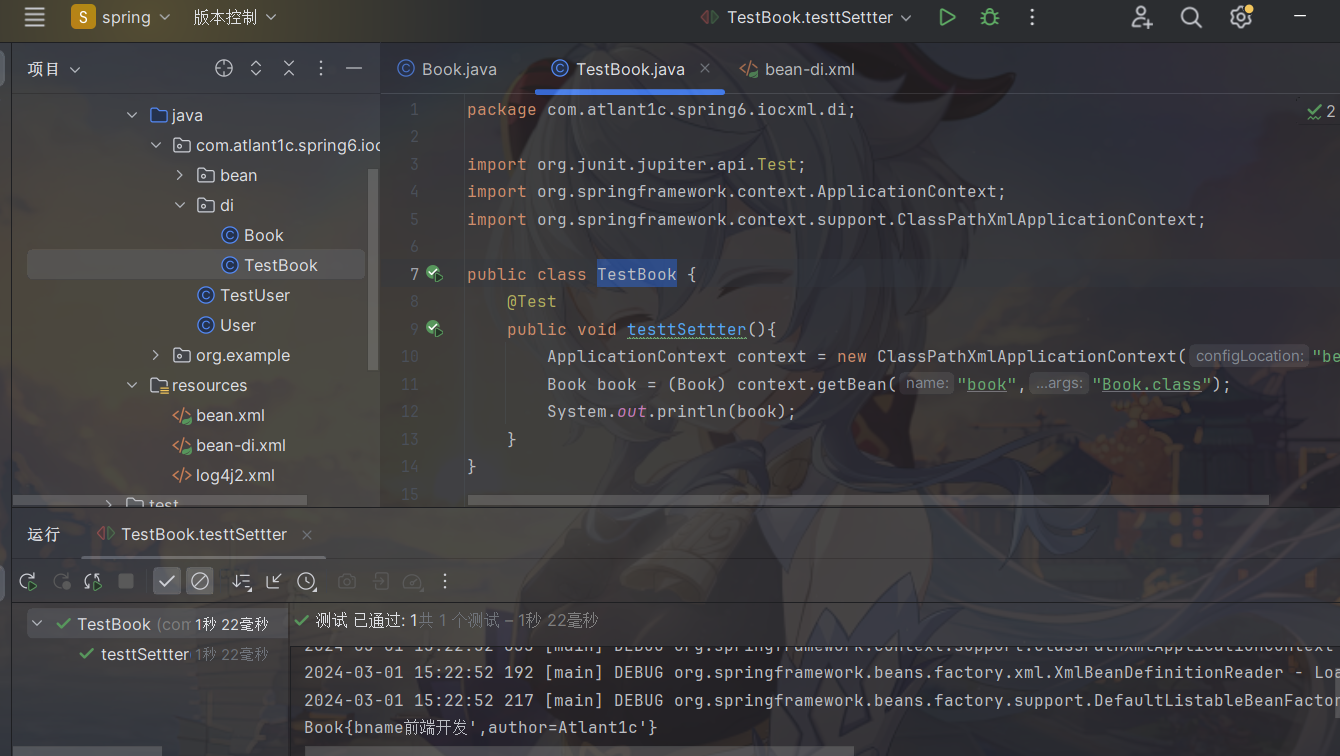
新建TestBook类
1 | package com.atlant1c.spring6.iocxml.di; |
基于构造器完成
创建类,定义属性,生成有参数构造方法
和上面一样
TestBook类中加入
1 |
|
配置文件添加
1 | <!--构造器方法完成注入--> |

特殊值处理
字面量赋值
1 | <!-- 使用value属性给bean的属性赋值时,Spring会把value属性的值看做字面量 --> |
null值
1 | <property name="name"> |
细节:
2
1以上写法,为name所赋值为字符串null
5.2.3.3xml实体
1 | <!-- 解决方案一:使用XML实体来代替 --> |
说明:
小于号在XML文档中用来定义标签的开始,不能随便使用
CDATA节
1 | <property name="expression"> |
注入对象类型属性值
有三种注入方式,第三种用得少就没去try
1 | //TestEmp.java |
配置文件
1 | <!--bean-ditest.xml--> |
注入集合类型属性值
1 | <?xml version="1.0" encoding="UTF-8"?> |
注入引用集合类型属性值
配置对应的命名空间
1 |
|
配置Bean
注:
- 使用标签,可以将List集合或者Map集合的属性注入变为引用的方式
- 在使用util标签时,需要引入相应的命名空间
引入外部属性文件
引入数据库相关依赖。
1
2
3
4
5
6
7
8
9
10
11
12
13<!-- MySQL驱动 -->
<dependency>
<groupId>mysql</groupId>
<artifactId>mysql-connector-java</artifactId>
<version>8.0.30</version>
</dependency>
<!-- 数据源 -->
<dependency>
<groupId>com.alibaba</groupId>
<artifactId>druid</artifactId>
<version>1.2.15</version>
</dependency>创建外部属性文件,properties格式。
创建spring配置文件,引入context命名空间进入属性文件,使用表达式完成注入。
Bean的生命周期
流程
bean对象创建(调用无参构造器)
bean对象设置属性
bean的后置处理器(初始化之前)
bean对象初始化(需在配置bean时指定初始化方法)
bean的后置处理器(初始化之后)
bean对象就绪可以使用
bean对象销毁(需在配置bean时指定销毁方法)
IOC容器关闭
引入FactoryBean属性值
用来整合其他框架
引入xml自动装配
自动装配就是让应用程序上下文为你找出依赖项的过程。service层给control层,control层给dao层。
在xml中通过byName进行自动装配
使用byName进行自动装配时候的注意事项
- bean的id必须与被装配的实体类中的setXXX()中的参数名相同
- 在beans中的bean的id必须具有唯一性。
在xml中通过byType进行自动装配
使用byType进行自动装配时候的注意事项:
- bean的class必须与被装配的实体类中的setXXX()中的参数类型相同
- 在beans中的bean的class必须具有唯一性。
基于注解管理Bean
从 Java 5 开始,Java 增加了对注解(Annotation)的支持,它是代码中的一种特殊标记,可以在编译、类加载和运行时被读取,执行相应的处理。开发人员可以通过注解在不改变原有代码和逻辑的情况下,在源代码中嵌入补充信息。
Spring 从 2.5 版本开始提供了对注解技术的全面支持,我们可以使用注解来实现自动装配,简化 Spring 的 XML 配置。
步骤
- 引入依赖
- 开启组件扫描
- 使用注解定义 Bean
- 依赖注入
使用注解
Spring 提供了以下多个注解,这些注解可以直接标注在 Java 类上,将它们定义成 Spring Bean
| 注解 | 说明 |
|---|---|
| @Component | 该注解用于描述 Spring 中的 Bean,它是一个泛化的概念,仅仅表示容器中的一个组件(Bean),并且可以作用在应用的任何层次,例如 Service 层、Dao 层等。 使用时只需将该注解标注在相应类上即可。 |
| @Repository | 该注解用于将数据访问层(Dao 层)的类标识为 Spring 中的 Bean,其功能与 @Component 相同。 |
| @Service | 该注解通常作用在业务层(Service 层),用于将业务层的类标识为 Spring 中的 Bean,其功能与 @Component 相同。 |
| @Controller | 该注解通常作用在控制层(如SpringMVC 的 Controller),用于将控制层的类标识为 Spring 中的 Bean,其功能与 @Component 相同。 |
开启组件扫描
实现组件扫描
步骤一:添加约束
1 | <?xml version="1.0" encoding="UTF-8"?> |
说明:
在 XML 配置的一级标签 中添加 context 相关的约束
步骤二:开启扫描方式
1 | <context:component-scan base-package="com.atguigu.spring6"> |
说明:
在Beans.xml文件中,设置开启扫描方式即可
指定要排除的组件
1 | <context:component-scan base-package="com.atguigu.spring6"> |
context:exclude-filter标签,指定排除规则
type属性:设置排除或包含的依据
属性值:annotation,根据注解排除
属性值:assignable,根据类型排除
expression属性:设置要排除的注解或类型的全类名
仅扫描指定组件
1 | <context:component-scan base-package="com.atguigu" use-default-filters="false"> |
说明:
use-default-filters=”false”,表示关闭默认扫描规则
context:include-filter,表示指定的过滤条件来确定哪些类应该被包含在组件扫描中
@Autowired注入
属性注入
通过@Autowired注释然后新建一个私有的属性,来注入该属性类。
set注入
把@Autowired注解用在set方法上进行注入。
构造注入
形参上注入
文件结构如下
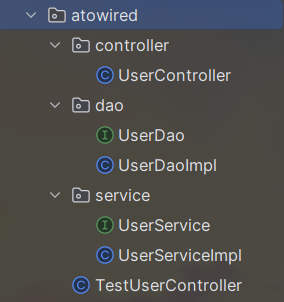
controller
1 | //UserController.java |
dao
1 | //UserDao.java |
service
1 | //UserService.java |
1 | //TestUserController.java |
@Autowired注解和@Qualifier注解联合
当dao层有两个类需要被注入时,就会报错

这个时候就需要根据名称注入
@Resourse注解
@Resource注解是通过名称匹配的方式来实现注入的,默认按照名称进行匹配,如果找不到匹配的名称,则会尝试按照类型匹配。
@Resource注解是JDK扩展包中的,也就是说属于JDK的一部分。所以该注解是标准注解,更加具有通用性。(JSR-250标准中制定的注解类型。JSR是Java规范提案。)
@Resource注解既可以用在setter中也可以用在属性当中,当Resource指定属性name名字时,就只会按照指定的name去查找bean,否则会报错。
当注解写在字段上时,@Resource不指定name,默认取字段名进行按照名称查找,如果注解写在setter方法上默认取属性名进行装配。如果最后都找不到与名称匹配的bean时才按照类型进行装配。我们运行也会成功
面向切面AOP
代理模式
JDK动态代理 | Atlantic (atlant1c.cn)
横切关注点
从目标对象中抽取出来的非核心业务,比如之前代理模式中的日志功能,针对于计算器功能来说,日志就是非核心业务。
这个概念不是语法层面天然存在的,而是根据附加功能的逻辑上的需要:有十个附加功能,就有十个横切关注点。
通知
非核心的业务再目标对象中叫做横切关注点,将横切关注点抽取出来封装到切面类中,他就是这个类中的一个方法叫做通知。
每一个横切关注点要做的事情都封装成一个方法,这样的方法就叫做通知方法。
- 前置通知:在被代理的目标方法前执行
- 返回通知:在被代理的目标方法成功结束后执行(寿终正寝)
- 异常通知:在被代理的目标方法异常结束后执行(死于非命)
- 后置通知:在被代理的目标方法最终结束后执行(盖棺定论)
- 环绕通知:使用try…catch…finally结构围绕整个被代理的目标方法,包括上面四种通知对应的所有位置
切面
封装横切关注点的类,通知的方法都写在切面类中
目标
被代理的目标对象,比如计算器的实现类
代理
代理对象
连接点
一个纯逻辑的概念:抽取横切关注点的位置,比如方法执行之前,方法捕获异常的时候等等。
连接点的作用:我们不但要抽取出来,还要套回去。
切入点表达式
在 AOP 中,切入点表达式指定了哪些方法需要被织入增强逻辑。它是一个表达式,用于匹配目标对象中的方法,并提供切入点的精确定义

基于注解AOP
概述:在Java类、方法、参数等上添加注解的方式来实现切面的定义和应用
基本用例:
步骤一:导入依赖
步骤二:创建切面类(需要选择通知方式)
步骤三:添加xml配置文件
通知方式:
- 前置通知:
@Before - 异常通知:
@AfterThrowing - 返回通知:
@AfterReturning - 后置通知:
@After - 环绕通知:
@Around
- 前置通知:
获取通知信息
获取连接点:在方法中使用JoinPoint即可获取连接点信息
1
2public void beforeMethod(JoinPoint joinPoint)
获取目标对象的返回值:在目标对象的返回通知上添加returning属性
1
2
public void afterReturningMethod(JoinPoint joinPoint, Object result)获取目标对象的异常:在目标对象的异常通知上添加throwing属性
1
2
public void afterThrowingMethod(JoinPoint joinPoint, Throwable ex)
重用切入点表达式
声明:在空参、空方法体、空返回值的方法上使用**@Pointcut**注解
1
2
public void pointCut(){}同切面使用:在同一切面中直接引用即可
1
不同切面使用:在不同切面中
1
基于XML注解的AOP
1 | <context:component-scan base-package="com.atguigu.aop.xml"></context:component-scan> |
JDBC template
【Spring】通过JdbcTemplate实现CRUD操作-腾讯云开发者社区-腾讯云 (tencent.com)
JdbcTemplate (Spring Framework 6.1.4 API)
使用JDBC - 廖雪峰的官方网站 (liaoxuefeng.com)
这是 JDBC 核心包中的中心委托。它可以直接用于许多数据访问目的,支持任何类型的 JDBC操作。此类简化了 JDBC 的使用,并有助于避免常见错误。 它执行核心 JDBC 工作流,让应用程序代码提供 SQL 并提取结果。此类执行 SQL 查询或更新,启动 对 ResultSet 进行迭代,捕获 JDBC 异常并进行转换 它们添加到常见异常层次结构中。org.springframework.dao